

Attaching a Headboard to the Wall: Simple Steps for Secure Mounting
Attaching a headboard directly to the wall is one of those straightforward projects that can completely change the feel of a room. It involves securing the headboard to the wall studs or, in some cases, using heavy-duty anchors for a rock-solid, permanent fit. As a local, family-owned business serving Central Florida since 1980, we at Slone Brothers Furniture have seen how this simple touch brings a custom feel to any bedroom.
The result? A high-end, floating look that also gets rid of any annoying wobbling. It's an excellent choice for anyone in the Orlando area aiming for a clean, modern, and polished bedroom design.
Why Wall Mounting a Headboard Is a Smart Move

Have you ever walked into a high-end hotel room and wondered how the bedroom feels so put-together and polished? A lot of the time, the secret is something simple: the headboard is attached directly to the wall. Here at Slone Brothers Furniture, we’ve shown countless homeowners across Central Florida how this small change can make a huge impact.
By mounting your headboard, you’re creating an immediate focal point that looks intentional and custom-designed. It gives your bed a completely stable, wobble-free foundation that's perfect for leaning against with a good book or a morning coffee. This method is also a lifesaver in smaller spaces, like a downtown Orlando apartment or a cozy Sanford bungalow, where freeing up just a few inches of floor space can make all the difference.
The Benefits of a Wall-Mounted Headboard
A securely mounted headboard does more than just look good—it brings a ton of practical advantages to your space. For many of our clients, the real draw is achieving a specific aesthetic that a standard bed frame just can't deliver.
Here are a few of the biggest benefits we see:
- Enhanced Stability: A wall-mounted headboard is anchored right into the structure of your home. That means no more shifting, rattling, or squeaking noises that you often get when a headboard is only attached to the bed frame.
- A Custom, Built-In Appearance: This technique makes your furniture feel like it’s part of the room's architecture, instantly elevating the entire design. A stunning solid wood headboard from a quality brand like Stickley, with its incredible heritage, truly shines when it's mounted this way.
- Space Optimization: When you eliminate that little gap between the bed and the wall, you gain a bit of extra room. It might not sound like much, but in a tight Central Florida layout, it can feel noticeably more open.
- Design Flexibility: Wall mounting frees you up to pair any headboard with any bed base you want. This is especially helpful for adjustable beds, which often don't have standard attachment points. You can learn more by checking out our guide on how to select the perfect bedroom furniture.
This move toward integrated, stylish bedroom furniture is definitely catching on. The global headboard market, which includes these popular wall-attached designs, was valued at a robust $7.2 billion and is projected to climb all the way to $12.8 billion by 2033. This growth shows just how many homeowners are investing in smarter, more beautiful living spaces.
Ultimately, choosing to mount your headboard is an investment in both the style and function of your bedroom. It’s a simple step toward creating that peaceful, polished retreat you've been dreaming of.
Gathering the Right Tools for Attaching Your Headboard to the Wall
Before you even think about drilling that first hole, let's talk prep work. Any home project, whether you're in a new build in Lake Mary or a classic Longwood home, goes a whole lot smoother when you have the right tools ready to go. Proper preparation is the secret ingredient for getting that clean, professional look when you attach a headboard to a wall.
Think of this as your pre-flight checklist. You don't need a professional workshop, but a few key items are absolutely non-negotiable for a secure, level, and stress-free installation. We’ve put together a practical list based on the types of walls we see all the time here in Central Florida—from standard drywall to the trickier plaster and block.
Your Essential Toolkit
Getting your gear in order from the start means you won't be scrambling mid-project. Here’s what we always recommend having within arm's reach:
- Stud Finder: Honestly, this is your most valuable player. Anchoring directly into a wall stud is the gold standard for making sure that headboard isn't going anywhere.
- Power Drill with Assorted Bits: You’ll need it for drilling pilot holes and driving in screws. Make sure you have both Phillips head and a variety of drill bit sizes on hand.
- Level (24-inch or longer): A longer level is your best friend for getting the headboard perfectly horizontal. Trust us, even a slightly crooked headboard is more obvious than you’d think.
- Tape Measure and Pencil: For marking heights, finding the center, and mapping out stud locations. A few seconds of accurate measuring here will save you a world of frustration later.
As you gather your tools, it's worth noting that many of the same principles for securing heavy objects apply here. A good guide to wall hooks can offer some great insights into choosing the right fasteners for the job.
Selecting the Right Hardware
The hardware you choose is just as important as the tools you use. It all comes down to your headboard’s weight and your specific wall type. Here are the go-to options we rely on:
- Flush Mount Brackets: Simple, effective, and secure. These interlocking brackets are a fantastic choice for lighter headboards. One piece goes on the wall, the other on the headboard, and they slide together for a surprisingly tight fit.
- French Cleats: This is our top recommendation for those heavy, solid wood headboards, like a beautiful American-made piece from Bassett or an Amish-crafted one from Simply Amish. A French cleat system uses two interlocking beveled boards that distribute the weight perfectly, providing incredible stability.
- Heavy-Duty Wall Anchors: What if a stud isn't right where you need it? That's when you turn to toggle bolts or Molly bolts for drywall. The key is to choose anchors rated for well more than your headboard's actual weight. The technique is very similar to hanging other large items, and you can learn more about it in our related article on the step-by-step guide to hanging your picture with precision.
A Neighborly Tip: If this list feels a bit much or you'd just rather not buy tools for a single project, that's what we're here for. Our in-house delivery and setup team shows up with everything needed to do the job right, ensuring your new furniture looks exactly as you envisioned it, with zero hassle on your end.
Your Guide to Attaching a Headboard to the Wall
Alright, you’ve got your tools ready, so it’s time for the main event—actually attaching a headboard to the wall. This is where a little patience and precision really pay off, creating a beautiful, secure result that elevates your entire bedroom. We'll walk through it with the kind of practical advice our Design Team offers every day in our Longwood showroom.
We’re going to skip the generic "Step 1, Step 2" format. Instead, let's focus on the key stages of a successful installation, ensuring your custom-ordered piece from a brand like Smith Brothers, known for its custom comfort, looks as if it were built right into your home.
This simple workflow shows the essential tools you'll need to locate studs, ensure a level installation, and secure your headboard.
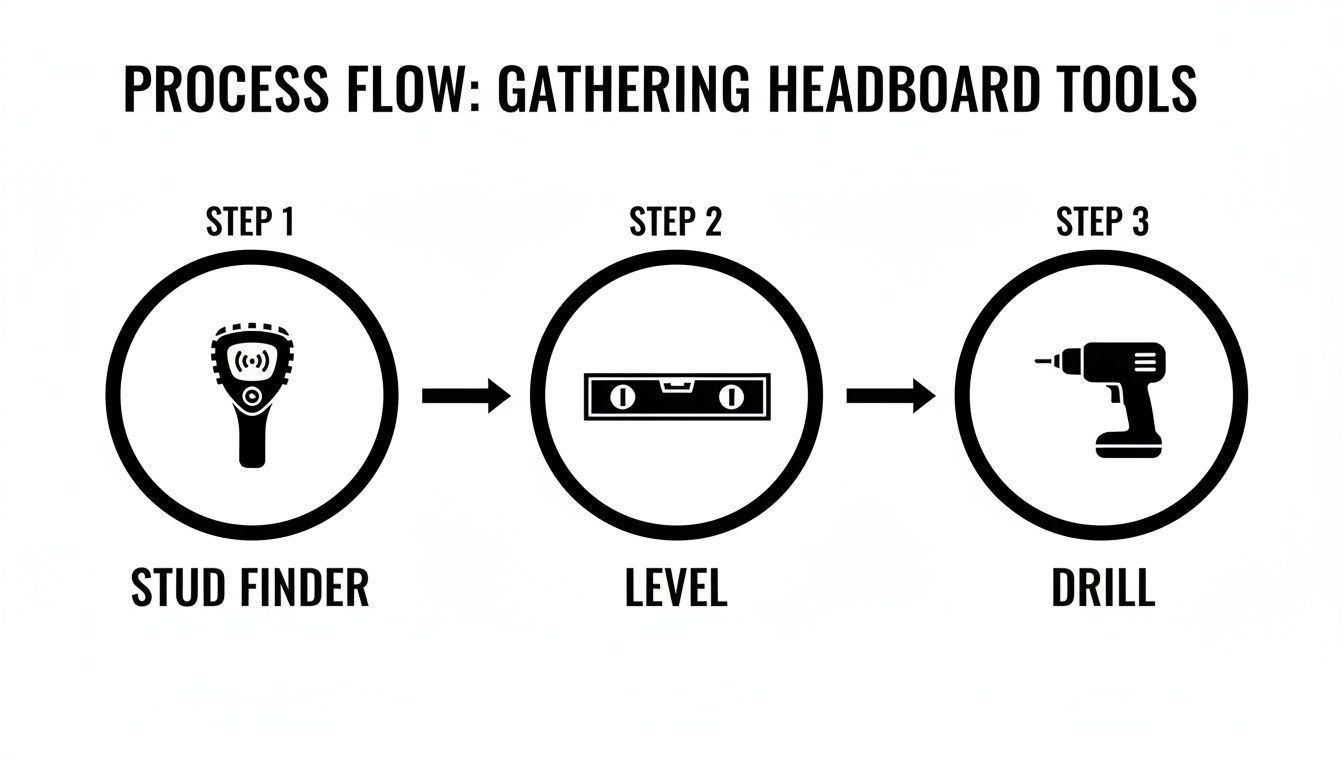
Starting with a stud finder, then using a level for alignment, and finishing with a power drill ensures a secure and perfectly positioned installation.
Pinpointing the Ideal Headboard Height
The first decision you'll make is exactly where on the wall the headboard should live. Getting the height right is crucial for both looks and comfort. Too low, and your pillows will cover it; too high, and it will look disconnected from the bed.
A great starting point is to measure the height of your mattress from the floor. You generally want the bottom of the headboard to sit a few inches below the top of your mattress. This placement ensures there isn't an awkward gap where pillows can slip through.
Our Design Team's Rule of Thumb: For a standard bed, aim to have the bottom of the headboard about 2-4 inches below the top of your mattress. This creates a seamless look while providing solid back support for reading in bed.
Once you have your starting height, lightly mark a level line on the wall with a pencil. This will be your guide for everything that follows.
Locating Wall Studs for Ultimate Support
The most secure way to mount anything heavy is by anchoring it directly into the wall studs—the vertical wooden beams that make up your home's frame. This provides a rock-solid foundation that you can trust to hold the weight of your headboard.
Run your stud finder along the wall in the area where you plan to install the headboard. Most will beep or light up when they detect a stud. Mark the center of each one you find along your level line. In most Florida homes, studs are typically spaced 16 inches apart on center.
Securing Your Mounting Hardware
With your height and stud locations marked, you're ready to choose how you'll attach this thing to the wall. The best option really depends on your headboard’s weight and where those studs landed.
Choosing the right mounting method is probably the most critical part of this process. It determines not just how your headboard looks, but how safe and secure it will be for years to come. Here’s a quick breakdown of the three most common approaches our team recommends.
Choosing Your Headboard Mounting Method
| Mounting Method | Best For | Pros | Cons |
|---|---|---|---|
| Direct Stud Mounting | Lighter headboards; when studs align perfectly with the headboard's structure. | Simplest, fastest, and incredibly strong when done right. | Relies on stud placement, which isn't always convenient. |
| Heavy-Duty Wall Anchors | Light to medium-weight headboards; when studs are not in the right place. | Offers good support in drywall; versatile placement. | Can be less secure than stud mounting for very heavy items. |
| French Cleat System | Heavy, oversized, or high-end headboards (e.g., solid Amish wood). | Distributes weight evenly; ensures a perfectly flush, professional look. | Requires more work to install both parts of the cleat. |
Each method has its place. For a standard upholstered headboard, anchors might be fine if the studs don't cooperate. But for a substantial, heirloom-quality piece, we almost always suggest a French cleat.
Let's dig into these options a bit more:
- Direct Stud Mounting: This is the gold standard for a reason. If the studs line up conveniently with the back of your headboard, you can often drill directly through the headboard and into the studs using long screws. It's an incredibly secure option.
- Heavy-Duty Wall Anchors: What if the studs aren't in the perfect spot? It happens all the time. In this case, heavy-duty drywall anchors, like toggle bolts or Molly bolts, are your best friends. These expand behind the drywall, distributing weight over a larger area. When you're working with drywall, this is essential. You can find more expert tips on securely mounting items in drywall to help guide you.
- French Cleat System: For heavy or oversized headboards, like a solid Amish-crafted piece, a French cleat is the superior choice. This system has two interlocking wooden or metal brackets cut at a 45-degree angle. One is mounted to the wall (ideally into studs), and the other to the headboard. The headboard then slides down and locks into place, spreading the weight evenly across the entire cleat. It's the method professionals use for a secure, perfectly flush installation.
Choosing the right hardware is essential for a lasting result. For upholstered pieces, the fabric's durability is just as important as the mounting. You can find out more by exploring everything you need to know about upholstery materials in our detailed guide. Careful planning here ensures your headboard will be a beautiful and stable addition to your bedroom for years to come.
Insider Tips for a Professional-Looking Finish
The difference between a DIY job that looks "good enough" and one that looks truly professional often comes down to the little details. After countless installations across the Orlando area, our delivery team has perfected the art of attaching a headboard to a wall with a polished, seamless finish. We wanted to share a few of those insider techniques with you.
These are the small tricks that ensure your headboard looks like it was always meant to be there, adding that final touch of craftsmanship to your bedroom project.
Achieving a Clean and Polished Look
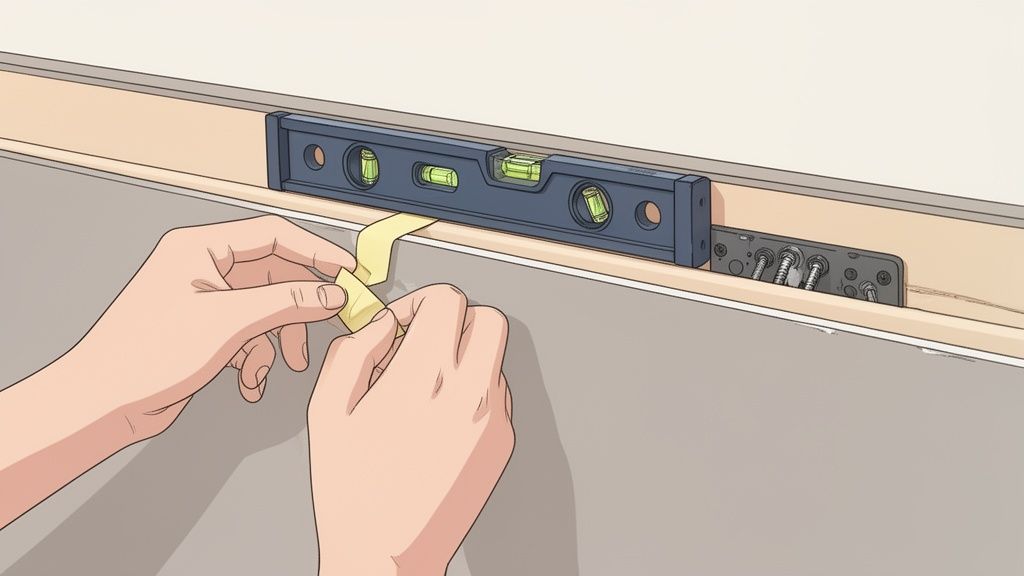
A clean installation starts with protecting your walls. Before you even think about drilling, place a strip of painter's tape over your marked spots. It's a simple step, but it prevents the drill bit from "walking" and creating a messy hole, and it helps you avoid scuffing your paint.
Another key to a professional finish is concealing the hardware. Whenever you can, choose mounting systems that stay hidden behind the headboard, like French cleats. This creates that true "floating" effect and keeps the focus on the beauty of your furniture, not the brackets holding it up. For more ideas on creating a beautiful, cohesive space, you can explore our guide on accessorizing the bed of your dreams.
Navigating Common Installation Hurdles
Even the most straightforward projects can throw you a curveball. One of the most important things you can do before you start is to check for pipes and wiring. A deep-scan stud finder is your best friend here—it can help map out what's behind the drywall, preventing a costly and dangerous mistake.
You might also find your walls aren't perfectly even, a common quirk in some of the charming, older homes you find in places like historic Sanford. If you notice a gap after mounting, resist the urge to overtighten the screws; you could end up warping the headboard.
Our Pro Tip: For uneven walls, grab some small felt furniture pads or rubber shims to place behind the mounting points. They can fill minor gaps, ensuring the headboard sits flush and stable without putting stress on the hardware or the piece itself.
This is where the flexibility of our custom-order program really shines. For clients with unique architectural challenges, we can sometimes work with brands like Amisco or American Leather to make small modifications to a piece, ensuring a perfect fit. It’s a level of personalized service that helps you get the exact look you want, no matter the quirks of your space.
Knowing When to Call in a Professional
A successful DIY project isn’t just about the work you do; it’s also about having the wisdom to recognize your limits. While many homeowners here in Central Florida are more than capable of mounting a headboard, there are definitely times when calling for professional help is the smartest—and safest—move.
This is especially true when you're dealing with an exceptionally heavy headboard. A beautiful, solid wood piece from our Simply Amish or Mavin collections, for example, has some serious weight to it. Getting that installation absolutely perfect and secure is non-negotiable. One slip could mean damage to your gorgeous new furniture, your wall, or even worse.
When Professional Expertise Is the Best Choice
Beyond just the headboard's weight, the wall you’re working with is a huge factor. Standard drywall is one thing, but many homes in the Orlando area feature surfaces that require specialized tools and a bit of know-how. If you're looking at any of the following, we strongly suggest calling for backup:
- Brick, Concrete, or Masonry Walls: These surfaces demand a hammer drill and the right masonry anchors to get a secure grip. Drilling into them the wrong way can cause cracking and permanent damage you can't easily undo.
- Antique Plaster Walls: Some of the wonderful older homes, like those you might find in historic Sanford, have traditional lathe and plaster walls. They can be incredibly brittle and are notorious for crumbling if you use the wrong technique or hardware.
- You Lack the Right Tools or Confidence: Let's be honest—if you're not comfortable using a power drill or don't own a reliable stud finder and a good level, it's better to let a pro handle it. A headboard that's even slightly crooked can become a visual thorn in your side every time you walk into the room.
An expert touch prevents those common little mistakes that can compromise both safety and the final look. Industry insights show that nearly 40% of DIYers run into problems with improper anchoring, which can lead to wobbly, unstable furniture down the road.
Slone Brothers Is Here to Help
The trend of wall-mounting headboards is part of a larger shift toward smart, space-saving furniture, much like the growing popularity of wall beds. These integrated designs need to be installed perfectly to be both functional and beautiful. You can dig deeper into this market shift and its drivers in this detailed wall bed market report.
If any of this sounds a bit daunting, that’s precisely why we offer our professional white-glove delivery and setup service. Our experienced team handles these kinds of installations every single day across Longwood and the Greater Orlando area. They show up with the right tools, the correct hardware for your specific wall type, and the expertise to ensure your new headboard is mounted perfectly, giving you total peace of mind.
For more complex projects or if you're planning a whole room makeover, our team is an invaluable resource. You can learn more about how our expert design services can help you pull your perfect bedroom together from start to finish.
Common Questions We Hear About Wall-Mounting Headboards
Our design team here in the Longwood showroom fields some fantastic questions about this process. It's smart to have all the answers before you start drilling, from navigating rental agreements to getting the height just right. We've gathered a few of the most common questions we hear from our neighbors around Central Florida to help you move forward with confidence.
How High Should I Mount My Headboard?
Figuring out the perfect height is the key to getting that polished, professional look. If it's too low, your pillows will swallow it whole. Too high, and it looks disconnected from the bed.
Here’s a simple rule of thumb we share with our clients: measure from the floor to the top of your mattress. You’ll want to position the bottom of the headboard about 2-4 inches below the top of the mattress. This little overlap gets rid of that annoying gap where pillows always seem to escape, and it gives you solid support when you’re sitting up to read.
Can I Wall-Mount a Headboard in My Rental?
Living in a rental doesn't mean you have to give up on style, but you definitely have to be smart about it. Before you do anything else, check your lease agreement for any rules about drilling into the walls. That’s always step one.
If you get the green light, aim for methods that leave the smallest possible footprint. For lighter headboards, you might be surprised what a few heavy-duty adhesive strips can do without leaving a mark. If you absolutely have to drill, using small pilot holes and the right anchors will make patching things up a breeze when it’s time to move out.
What’s the Best Way to Hang a Really Heavy Headboard?
When you’re dealing with a substantial, heavy headboard—like one of the beautiful solid wood pieces from our American-made Bassett or Stickley collections—safety is everything. You can't cut corners here.
For these installations, we always recommend a French cleat system. This method uses a pair of interlocking brackets to distribute the weight evenly across multiple wall studs, giving it incredible strength and stability. It's the same technique used to hang heavy cabinets and large mirrors securely.
For the heaviest pieces or if you're just not comfortable with the installation, our professional delivery and setup service is always the safest bet. Our team ensures your investment is mounted perfectly, protecting both your new furniture and your home.
Does the Bed Frame Need to Be Attached to the Headboard?
This is a question we get all the time, and the answer is almost always no! When you attach the headboard directly to the wall, the wall itself is doing all the heavy lifting and providing the support. Your bed frame just needs to be pushed up snugly against it.
Keeping them separate actually gives you more flexibility down the road. It means you can easily swap out your bed frame or even upgrade to an adjustable base without having to worry about whether it will all connect. The wall provides all the stability you need for that sturdy, built-in feel.
Ready to find the perfect piece for your home? Visit the Slone Brothers Furniture showroom in Longwood, FL, and let our design experts help you get started