

How to Measure a Room for Furniture for a Perfect Fit in Your Central Florida Home

That amazing feeling when you find the perfect sofa can sour pretty quickly if you get it home and realize it won't even fit through the front door. We've seen it happen. As a family-owned business serving the Greater Orlando area since 1980, we know the most important part of your design journey happens right in your own home, with a trusty tape measure in hand.
Taking the time to measure your space isn't just a suggestion—it's the single best way to ensure every piece you fall in love with, from our American-made collections to our Stressless recliners, will have a place to call home. This guide will walk you through exactly how to measure a room for furniture to make your next trip to our Longwood showroom a confident and successful one.
Why a Tape Measure Is Your Most Important Design Tool
Shopping for furniture without knowing your room’s exact dimensions is a bit like grocery shopping while you’re hungry and without a list. You’re almost guaranteed to make a costly mistake.
Measuring first is the non-negotiable step that saves you from the massive headache of returns and delivery day disasters. It’s a real issue, too—returns due to size mismatches cost the furniture industry billions every year. You can get more insights into the U.S. furniture market from industry reports like this one from Grandview Research.
Think of your measurements as your personal shopping guide. This simple roadmap empowers you to walk our Longwood showroom with total confidence, knowing exactly what will and won't work in your Central Florida home. Whether you're designing a custom American-made sectional through our Custom-Order Program or snagging a beautiful find from our Clearance Outlet, this prep work is what makes it all come together.
Your Room Measurement Toolkit
Getting started is simple. You don't need a professional designer's toolkit—just a few basic items will get the job done right. Having these ready before you begin will make the whole process feel less like a chore and more like the first exciting step in your design project.
| Tool | Why It's Essential |
|---|---|
| Metal Tape Measure | A 25-foot locking tape measure is your best friend. It’s far more accurate and easier to handle than a soft sewing tape. |
| Pen and Paper | A simple notebook or a clipboard is perfect for sketching your room's layout and jotting down every single number. |
| A Helper | An extra set of hands isn't required, but it makes measuring long walls or high ceilings much easier and more precise. |
With these tools in hand, you’re ready to create an accurate map of your space.
Our Design Team Tip: Always, always measure everything twice! It’s a simple habit that catches small errors before they become big, frustrating problems. A quarter of an inch can make all the difference, especially when you're investing in quality, custom-order furniture from Slone Brothers.
Once you have your room dimensions down, the next step is knowing what to do with them. While this guide is all about measuring your space, we also have resources to help you understand the size of the furniture itself. For a complete picture, be sure to check out our guide on how to measure furniture before you start shopping.
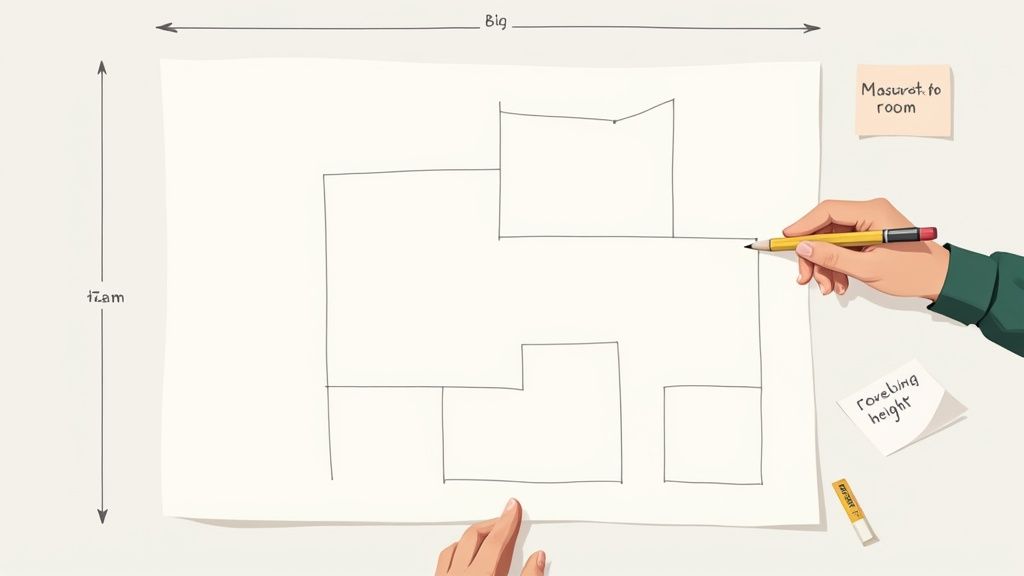
Sketching Your Room’s Core Dimensions
Alright, with your tools in hand, it's time to map out your room. Think of this as creating a simple blueprint—it’s the foundation for every single furniture decision you'll make from here on out. This sketch turns those abstract numbers into a visual guide you can actually work with. Don't stress about making it perfect; clarity is what we're after, not a work of art.
Start by drawing the basic shape of your room from a bird's-eye view. Now, grab that tape measure. To get the most accurate length and width, measure from one wall to the opposite wall right along the baseboard. We always recommend taking this measurement in two or three different spots. It's a quick way to check for any quirks—especially in older Orlando homes where walls aren't always perfectly straight. If you get slightly different numbers, always use the smallest one. It's the safest bet.
Don't Forget to Look Up
Ceiling height is one of those details that's so easy to overlook, but it's absolutely crucial for creating a space that feels balanced and open. Just measure from the floor to the ceiling in at least one corner.
This number is non-negotiable if you’re even thinking about taller furniture. A grand, Amish-crafted bookcase or an elegant four-poster bed needs enough vertical breathing room to not only fit but also to keep from overpowering the space. Knowing your ceiling height helps you pick pieces that are scaled to your room's volume, not just its floor plan.
This whole process—gathering tools, measuring the room, and sketching the layout—is the heart of how you measure a room for furniture.
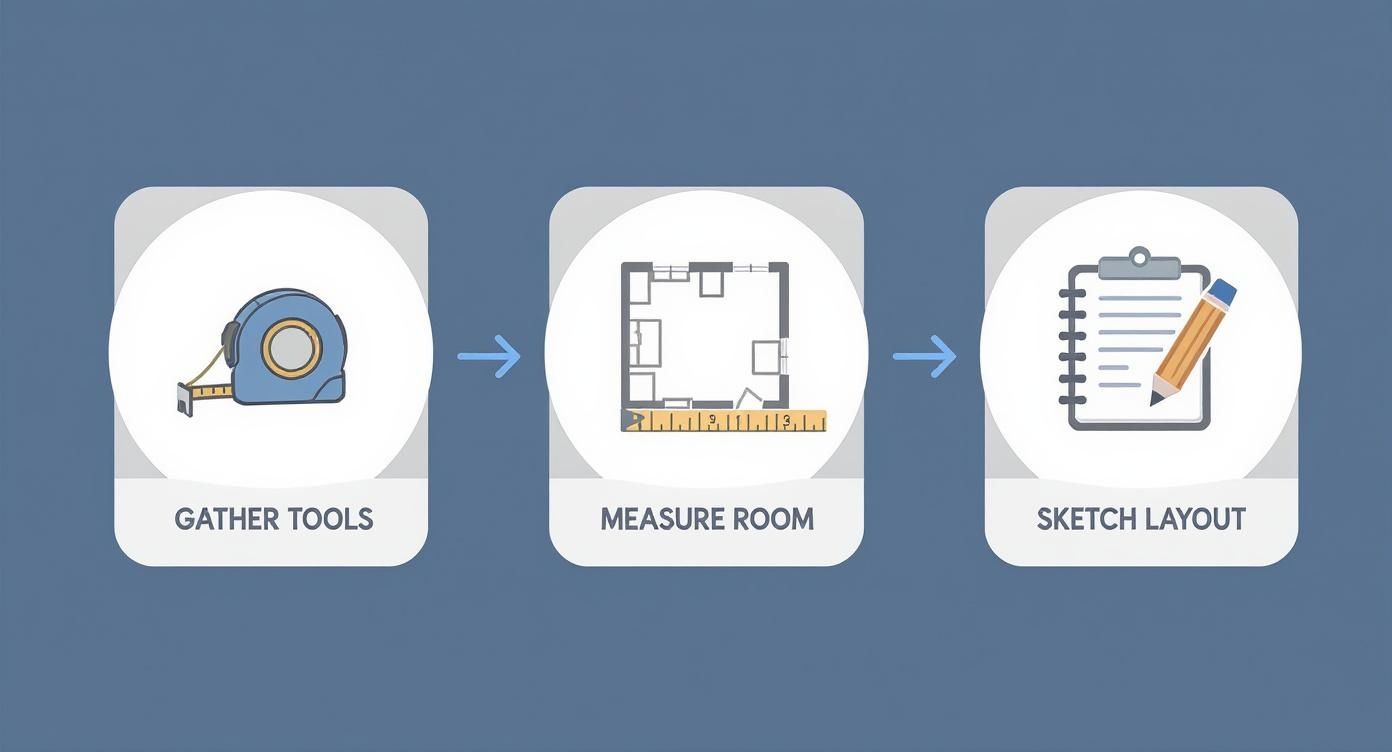
As you can see, a successful project always starts with a bit of prep work, moving logically from the big picture to a more detailed plan.
Creating Your Blueprint
Back to your sketch. Clearly label the length and width with the numbers you just wrote down. This simple diagram is more powerful than it looks. It’s the first real step to seeing your room’s potential and helps our team immediately get a feel for your space when you visit us.
A clear, simple sketch with accurate dimensions is the best communication tool you can bring to a design consultation. It allows our In-House Design Team to immediately start offering practical, tailored advice for your specific Orlando home.
Doing this foundational work makes the entire shopping experience so much smoother. If you’re curious about how this first step fits into the grand scheme of things, you can learn more about how our experts recommend you start the interior design process for a room in our detailed guide. It’s all about building a solid plan, one measurement at a time.
Mapping Your Room’s Unmovable Features
Once you’ve captured the core dimensions of the room, it's time to get into the details that really dictate your layout: everything that can't be moved. These fixed features are the true anchors of your space, determining where your beautiful new pieces can—and absolutely can't—go.
Documenting these elements on your sketch is one of the most important things you can do to avoid frustrating surprises later. There's nothing worse than finding the perfect console table, only to get it home and realize it completely blocks the only convenient power outlet. A few extra moments now saves a major headache down the road.
Accounting for Doors and Windows
Doors and windows are the biggest players here, as they impact both placement and traffic flow. You need to note not just the opening itself but also the space they require to function properly.
- Doorways: Measure the width of the door opening, from one side of the frame to the other. Then, mark the direction the door swings into the room on your sketch. That "swing space" is unusable floor space for furniture.
- Windows: Measure the width of the window from casing to casing. Crucially, you also need to measure the distance from the bottom of the window sill to the floor. This number determines the maximum height for any furniture—like a sofa or sideboard—you might want to place beneath it.
For many of us in Central Florida, this also means accounting for sliding glass doors. Be sure to measure the full width of the sliding unit and clearly mark which panel moves. You’ll want to preserve that easy access to your lanai or patio, so avoid placing large, heavy furniture in a way that obstructs the opening.
Identifying Other Critical Obstacles
Beyond the obvious windows and doors, your room has other fixed features that are essential to a functional design. Walk around your room and add these to your sketch, measuring their exact location from the nearest corner for accuracy.
The most successful room designs are the ones that respect the room's built-in limitations. By working with these fixed features instead of against them, you create a layout that feels intentional, functional, and completely natural.
Key features to locate and mark on your map include:
- Light Switches and Outlets: Note every single one. You'll want to ensure they remain accessible and aren't awkwardly hidden behind a tall bookcase or the new headboard you've been eyeing.
- Vents and Radiators: Blocking airflow is inefficient and can even be a hazard. Plan to keep furniture at least a few inches away from all vents to let the air circulate, especially important for keeping your A/C running efficiently in the Florida heat.
- Architectural Details: Mark the location and dimensions of any fireplaces, built-in shelving, columns, or architectural niches. These elements are part of your home’s character and should be highlighted, not hidden away.
Mapping these unmovable features provides the final, critical layer of detail for your floor plan. This level of preparation is especially helpful when you're considering pieces for a specific purpose, like in a dining room. For more guidance, explore our thoughts on designing a dining room and where to start.
Planning for How You Actually Live in the Room
A beautifully furnished room is pointless if you can’t move around comfortably. Your sketch is now more than just lines on paper; it's a map of your daily life. This is where we focus on the "invisible" space—the walkways and clearance your family needs for everything from carrying groceries to relaxing with friends.
This step is especially important in the open-concept homes common across Lake Mary and Sanford. Thoughtful furniture placement is the key to defining different zones without creating frustrating bottlenecks. Getting this right ensures your new layout feels open and functional, not cramped and awkward.
The Rules of Traffic Flow
Interior designers use a set of guidelines to make sure a room flows naturally. Think of these as best practices, not strict laws, but they provide a fantastic starting point for creating a comfortable, usable space. Keeping these numbers in mind as you plan will make a world of difference.
- Major Walkways: Aim for 30 to 36 inches of clear space for main pathways. This allows two people to pass by each other without turning sideways.
- Minor Paths: For smaller paths, like the space between a chair and a wall, a minimum of 18 to 24 inches is usually enough.
- Coffee Table Clearance: The ideal distance between your sofa's edge and your coffee table is 16 to 18 inches. This is close enough to reach your drink but far enough to let you walk through.
- Seating Distance: To encourage conversation without shouting, position seating no less than 3.5 feet and no more than 10 feet apart.
Using a different colored pen, lightly sketch these pathways onto your floor plan. Mark out the major traffic routes—from one doorway to another, or from the hallway into the main seating area. This visual guide will immediately show you where you can and cannot place large furniture.
Visualizing Your Living Space
Now you can start to see how furniture will interact with your daily habits. For instance, if you're placing a sofa and TV, you'll want to ensure the main walkway doesn't cut directly in front of the screen. A good layout preserves sightlines and keeps high-traffic areas clear of obstruction.
For more specific advice, our team put together a guide on how to calculate the best placement for your sofa and television to create a functional entertainment zone.
A well-planned room anticipates your needs. By mapping out traffic flow before you shop, you're designing a space that works for your family's lifestyle, not against it. It’s the difference between a showroom and a true Central Florida home.
Consider the dining room as another practical example. You need about 36 inches of clearance between the edge of your dining table and the wall or other furniture. This provides enough room for someone to pull out their chair and sit down comfortably, even while others are already seated. Accounting for this clearance is a critical part of how to measure a room for furniture, ensuring your beautiful new dining set is a place for gathering, not squeezing.
Making Sure Your New Furniture Fits Through the Door
You’ve found it—the perfect Amish-crafted sectional or that beautiful Stressless recliner you’ve had your eye on. You've measured your room, planned the layout, and you can already picture it in your home.
But hold on. There's one critical step many people forget until it's too late: making sure your new furniture can actually get into the room.
This is the journey your new piece will take, and every inch of it matters. We want your delivery day to be a moment of pure excitement, not a stressful puzzle of pivots, squeezes, and scrapes. Taking a few extra measurements of the delivery path beforehand ensures our team can bring your furniture into your home smoothly and without any surprises.
Mapping the Delivery Route
Put yourself in the shoes of our delivery team. Start at your front door and walk the exact path your furniture will travel to its final destination. As you go, measure the width and height of every single entryway it must pass through.
- Doorways: Measure the width from one side of the doorjamb to the other. Also, measure the diagonal height from the bottom corner of the frame to the top corner on the opposite side. Sometimes, a tall piece can make it through on a diagonal when it won't fit straight on.
- Hallways: Check the width of your narrowest hallways. Don't forget to account for any permanent fixtures like radiators or console tables that might eat into that precious space.
- Stairwells: Stairs can be the trickiest part of any delivery. Measure the width of the stairwell, but pay close attention to the ceiling height at the lowest point, especially where the stairs turn or on a landing.
Spotting Potential Obstacles
Beyond simple width and height, look for anything that could become a roadblock. Seemingly small details can become major headaches for a large piece of furniture.
Keep an eye out for:
- Tight Corners: A sharp turn from a hallway into a room is a classic delivery challenge.
- Low-Hanging Fixtures: Chandeliers or pendant lights in entryways and stairwells can get in the way. Measure the clearance from the floor to the bottom of the fixture.
- Handrails and Banisters: These can significantly reduce the usable width of a staircase or landing, so measure the space between them, not just wall-to-wall.
Planning for delivery is a crucial part of how to measure a room for furniture. A piece that fits perfectly in a room is useless if it's stuck in the hallway. Our goal at Slone Brothers is to ensure a seamless experience from our Longwood showroom to your living room.
When you share these delivery path measurements with our In-House Design Team, we can help you confirm that your chosen pieces will make it inside without a hitch. This proactive step is what transforms a good shopping experience into a great one.
Matching Furniture Scale to Your Space
Now that you have your detailed room sketch, you’re ready for the exciting part: connecting those numbers to your new furniture. This is where you translate the dimensions on your page into real-world proportions, making sure every piece you choose feels perfectly at home. Thinking about scale is what separates a cluttered room from a balanced, harmonious, and truly livable space.
A fantastic—and simple—trick we always recommend is using painter's tape on your floor. Thinking about a new living room sectional? Outline its full footprint with the tape. This lets you literally "see" the piece in your space. You can walk around it and get a tangible feel for how much floor it will really occupy. It’s an invaluable step before you commit to a significant piece from a quality brand like Stickley.
Proportions for Key Rooms
Applying the concept of scale changes a bit depending on the room's purpose. Every space has its own rhythm and requirements for comfort and usability.
-
For the Dining Room: When you’re choosing a dining set, your measurements need to account for more than just the table itself. You have to leave enough room for chairs to be pulled out and for people to walk behind them without squeezing by. A solid rule of thumb is to leave at least 36 inches of clearance from the edge of the table to the nearest wall or another piece of furniture.
-
For the Bedroom: Your bedroom should feel like a sanctuary, and that means striking the right balance between the size of your bed and the space you need to move. Bedroom furniture makes up about 35.13% of the U.S. furniture market, so getting this right is clearly important to a lot of people. A standard queen bed is roughly 60×80 inches, and you’ll want 24 to 36 inches of open space around it to comfortably make the bed and get to your dressers or nightstands.
Bringing Your Measurements to Life
While measuring your room ensures the big picture works, it’s just as important to know how to accurately measure furniture itself. This guarantees everything is properly scaled and, crucially, will fit through your doorways on delivery day. Having both sets of dimensions is the secret to a flawless plan.
Our design team often says, "Scale is the silent partner in good design." A room with properly scaled furniture just feels right, even if you can’t quite put your finger on why. It’s about creating comfort and flow, not just filling a space.
Understanding how to match furniture to your room’s unique layout is a huge step in the design process. To dive deeper into this, our experts have put together a guide on how to choose the best furniture for the layout of your home.
Answering Your Top Furniture Measuring Questions
Even with the best plan, you're bound to run into a few tricky spots. Our design team hears a lot of the same questions from our customers across Central Florida, so we're here to help solve them.
What If My Room Isn't a Perfect Square?
This is probably the number one question we get. So many beautiful Orlando-area homes feature interesting angles, cozy alcoves, or flowing open-concept layouts. The trick is to stop seeing the room as one big, complicated shape.
Instead, break it down into smaller, more manageable rectangles or squares. Measure each of these individual sections, then simply add them together to get your total workable area. Once you have those core dimensions, you can get creative with challenges like furnishing an oddly-shaped room and making the layout work for you.
Should I Round My Measurements Up or Down?
It's tempting to round up to a nice, even number, but our advice is simple: don't round up. Ever.
Always stick with the exact measurement you took. If you're going to round at all, round down by a quarter or half-inch just to be safe. Trust us, that tiny bit of extra wiggle room is a lifesaver. It’s always, always better than realizing your new sofa is a half-inch too wide for the wall.
Feeling inspired? Stop by our showroom and chat with our Design Team for a complimentary consultation.


