
How to Remove Scratches from Wood Furniture: A Practical Guide
That gorgeous Amish-crafted dining table or classic Stickley bookcase is often the heart of a Central Florida home. So when an accidental scratch appears, it can feel like a major setback. The good news is, learning how to remove scratches from wood furniture is simpler than you might think, and the right fix depends entirely on the scratch's depth. Minor surface scuffs can often be buffed out with household items, while deeper gouges might need a little more help from specialized wax fillers or touch-up markers.
Your Guide to Flawless Wood Furniture
For homeowners in Longwood, Orlando, and across Central Florida, daily life can leave its mark on cherished pieces. From a dropped set of keys to a pet's playful claws, scratches are almost inevitable. But a small imperfection doesn’t mean your furniture’s best days are behind it. Learning a few simple repair techniques is a smart, sustainable choice, empowering you to maintain the long-term value of your investment.
Here at Slone Brothers Furniture, a local family-owned business since 1980, we’ve always believed in the lasting value of quality craftsmanship. This philosophy lines up with a growing trend among homeowners to repair and restore rather than replace. Caring for your furniture isn't a chore; it's a way to preserve the pieces you love and the memories made around them.
Understanding the Damage
Before you can fix a scratch, you have to know what you're dealing with. Not all scratches are created equal, and the right approach depends entirely on how deep the damage goes and the type of finish on your furniture. For a broader perspective, this guide on how to restore wooden furniture offers some fantastic insights.
You'll generally run into three main types of damage:
- Minor Surface Scuffs: These are the most common and easiest to fix. They only affect the top protective layer—the finish—and haven't broken through to the wood or stain.
- Finish-Level Scratches: These go a bit deeper, scraping away the finish and sometimes the stain, but the wood underneath is still untouched.
- Deep Gouges: This is the most significant damage. The scratch has sliced through the finish and stain, digging into the actual wood itself.
At Slone Brothers, our Design Team often reminds customers that the durable, high-quality finishes on brands like American-made Bassett or Simply Amish are designed to withstand daily use. But when accidents happen, knowing how to assess the damage is the first step toward a flawless repair.
The key is to always start with the least invasive method first. By correctly identifying the scratch, you can choose the right tools and techniques, ensuring a beautiful result without accidentally causing more harm. For more tips on general upkeep, our guide on how to care for wood furniture provides a great foundation for protecting your investment.
Assessing the Damage and Gathering Your Tools
Before you jump into fixing that annoying scratch on your beautiful wood furniture, you need to play detective for a minute. The first step—and honestly, the most important one—is figuring out exactly what you’re dealing with. Going too aggressive on a minor scuff can turn a small problem into a big one, while a weak fix on a deep gouge is just a waste of your time.
The best way to figure it out? Use your fingernail. It’s a simple but surprisingly effective trick. Gently run your fingernail perpendicular to the scratch. If it glides right over without catching, you’re in luck. That’s just a surface-level issue, probably only in the top finish.
But if your nail snags in the groove, the damage is deeper. It's gone through the finish and might have reached the stain or even the wood itself.
This little flowchart is a great visual guide to help you size up the situation at a glance.
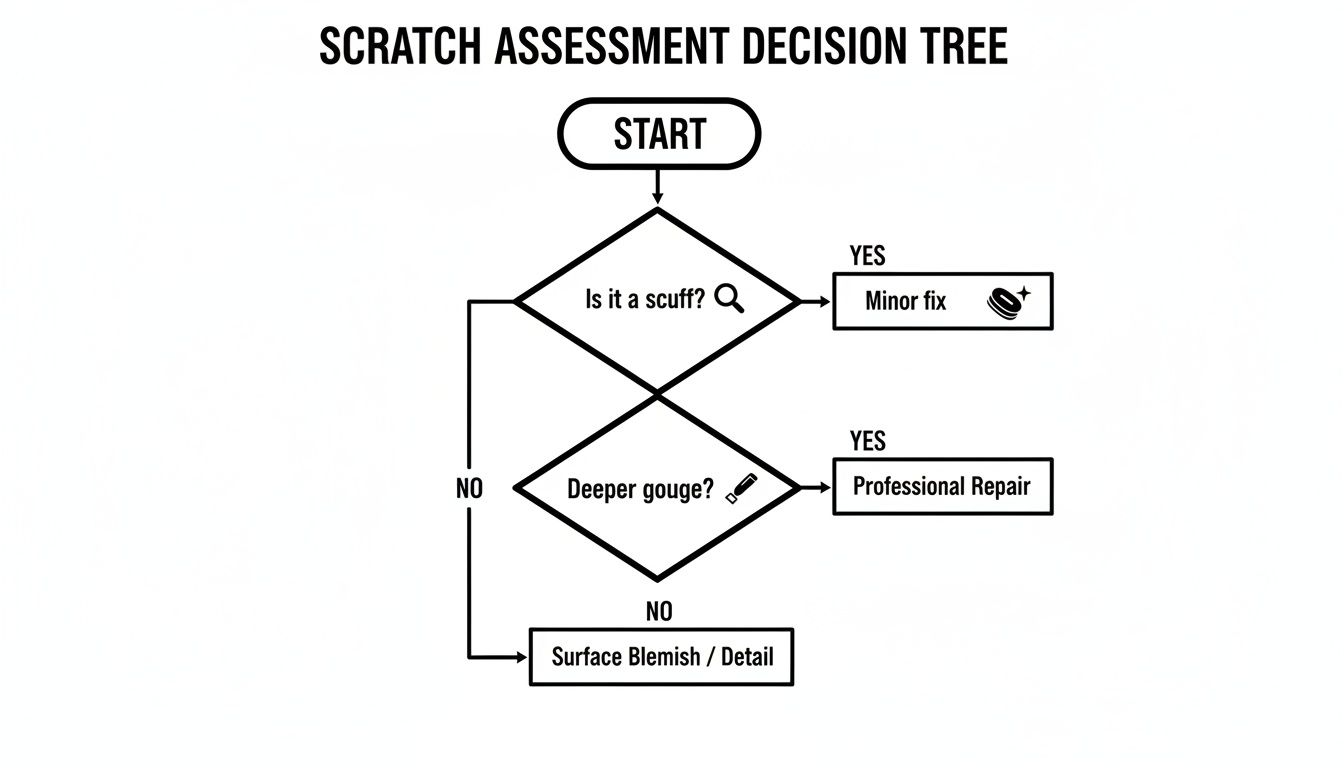
As you can see, a simple scuff just needs a light touch, but a gouge that’s broken through the finish requires a bit more elbow grease.
To make it even easier, here's a quick reference table to help you match the scratch to the right at-home solution.
Quick Guide to Scratch Types and DIY Solutions
| Scratch Type | How to Identify It | Recommended DIY Fix | Best For |
|---|---|---|---|
| Surface Scuff | A light, discolored mark; your fingernail glides over it. | Polish, wax, or natural remedies (walnuts, coffee grounds). | Light-colored marks on the top protective layer (lacquer, polyurethane). |
| Minor Scratch | A shallow groove that catches your fingernail but hasn't reached the raw wood. | Touch-up markers or crayons. | Scratches that have broken the top finish but not the stain. |
| Deep Gouge | A noticeable groove where the raw, lighter-colored wood is visible. | Wax filler sticks or wood putty. | Deeper damage that requires filling and re-coloring. |
With this table, you can quickly diagnose the problem and find the right tool for the job, ensuring you don't make the scratch worse.
Your Essential Toolkit for Wood Repair
Now that you know what kind of scratch you're up against, it's time to gather your supplies. Having everything ready beforehand saves you from frantically searching for things mid-repair and helps guarantee a much cleaner result. Your toolkit will change depending on the damage.
For minor surface scuffs, you might not need to buy a thing:
- Soft, lint-free cloths: Microfiber is perfect. You'll need one for applying products and another for buffing.
- A walnut or pecan: Seriously! The natural oils in these nuts can work wonders on light scratches by filling and darkening them.
- Coffee grounds or a tea bag: For darker finishes, a paste made from used coffee grounds or a damp tea bag can help stain and hide tiny blemishes.
For deeper scratches that break the finish, you’ll need to step it up a notch:
- Touch-up markers and wax filler sticks: These are your best friends for deeper damage. They come in a ton of wood tones to help you color-match the repair.
- Fine-grit sandpaper: Think 220-grit or higher. You'll use this very, very lightly to smooth out any filler you apply.
- Mineral spirits: This is for cleaning. It removes any grime or old polish, ensuring fillers and stains stick properly.
A Pro Tip From Our Design Team: Always, always test your repair product—whether it's a marker, wax stick, or polish—on a hidden spot first. Try the back of a table leg, underneath a chair seat, or inside a cabinet door to make sure the color and sheen are a perfect match.
Preparing Your Workspace
The setup is just as important as the repair itself. Find a spot with good lighting and decent ventilation, especially if you’re using mineral spirits or other products with fumes. A garage or a room with open windows is ideal for our Florida climate. Always lay down a drop cloth or some old newspapers to protect your floors.
Before you do anything else, clean the scratched area thoroughly. A soft cloth, a little water, and a drop of mild soap will remove any dust, wax, or grime. Then, dry it completely. A lasting fix absolutely depends on a clean surface.
It also helps to know what kind of wood you're working with. Different hardwoods react differently to products, which you can learn more about in our wood furniture guide. This knowledge is especially useful for the beautiful American-made pieces we carry in our Longwood showroom from brands like Stickley or Mavin.
Okay, assessment complete and tools at the ready? You're all set to make that scratch disappear for good.
Simple Fixes for Minor Surface Scratches
It’s a familiar story for homeowners in Orlando and Lake Mary: you invest in a beautiful piece of wood furniture, only to discover a frustrating surface scratch. These are the light scuffs that only break into the top protective layer, or finish. The good news? Before you even think about a costly repair, some of the best solutions are probably sitting in your kitchen pantry right now.
These gentle, at-home fixes are perfect for the everyday wear and tear on durable, American-made pieces from brands like Bassett and Craftmaster. Scratches are a universal headache, fueling a multi-billion dollar scratch remover market. But for Central Florida homeowners looking to protect their investments—like a classic Stressless recliner with its innovative comfort or a dining set from our Mavin collections—knowing a few simple tricks can save the day.
While minor surface scratches affect up to 70% of household wood items each year, it's worth noting that many over-the-counter removers fail on 40% of cases that involve deeper damage. You can read more about these market trends to see just how common this issue is.
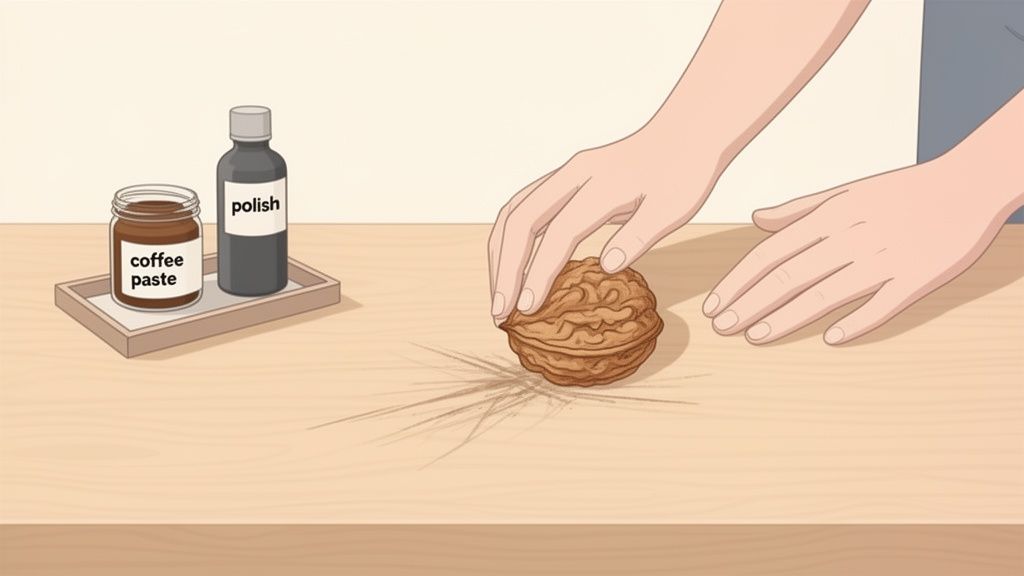
The Surprising Power of a Walnut
Believe it or not, one of the oldest tricks in the book is still one of the best for faint, whitish scratches on a finished surface. A simple walnut can work absolute magic. It’s packed with natural oils that, when rubbed into a shallow scratch, help fill and darken the blemish until it virtually disappears.
Here’s how you do it:
- Crack open a walnut and grab one of the halves.
- Gently rub the meaty part of the nut directly along the scratch, always moving with the wood grain.
- Let the oils soak in for about five to ten minutes. You’ll see the natural stain start blending in.
- Finish by buffing the area with a soft, lint-free cloth to wipe away any excess oil and bring back the shine.
This trick is most effective on sealed finishes like polyurethane or lacquer, where the damage is just a light abrasion on the topcoat.
Using Coffee or Tea for Darker Finishes
What about furniture with a darker stain, like a rich mahogany or deep espresso? A walnut might not be dark enough to do the trick. That’s where used coffee grounds or a strong black tea bag come in handy. The tannins in both act as a natural dye, staining the lighter, exposed wood within the scratch to match the rest of the piece.
You can mix a small amount of used coffee grounds with a few drops of water or olive oil to form a thick paste. Using a cotton swab, carefully dab the paste right into the scratch. Let it sit for about 10 minutes, then gently wipe away the excess. For a cleaner method, just steep a black tea bag in a tiny bit of hot water for a few minutes, then use a cotton swab to apply the concentrated tea to the blemish.
Our design team often suggests this for quick touch-ups on dark, American-made pieces. It’s a low-risk, high-reward solution that avoids harsh chemicals and aligns perfectly with our belief in practical, sustainable home care.
Polishes and Conditioners for a Final Touch
Sometimes, a minor scratch isn't so much a gouge as it is a sign that the finish is dry and dull. A high-quality furniture polish or a specialized wood conditioner can often hide these light scuffs by restoring moisture and shine. Look for a product with natural waxes and oils, which can fill in microscopic abrasions and even out the surface appearance.
Always apply polish with a clean microfiber cloth, working in the direction of the wood grain. This ensures the product is distributed evenly and prevents you from accidentally creating new, tiny scratches. Once applied, grab a second clean cloth and buff the surface to a beautiful, consistent sheen. This final step not only hides the imperfection but also adds a fresh layer of protection, keeping your furniture looking its best.
Tackling Deeper Scratches and Gouges
You know it’s more than just a surface scuff when you run your hand over it and your fingernail catches in the groove. Deeper scratches and gouges—the kind that cut right through the finish to expose the pale, raw wood underneath—can be truly disheartening. It’s a gut-wrenching feeling, especially on a treasured piece like a beautiful Simply Amish dining table.
But that sinking feeling doesn’t have to last. You’ve got some fantastic options that go far beyond the pantry remedies we talked about earlier. With the right tools and a little bit of patience, you can make those more significant marks virtually disappear.
It's a repair more and more homeowners are choosing to make themselves. In fact, people are increasingly opting to restore beautiful furniture rather than replace it. Here at Slone Brothers Furniture, we've been helping Central Florida families keep their high-quality, American-made furniture looking its best since 1980, and we’re big believers in the value of a great repair.
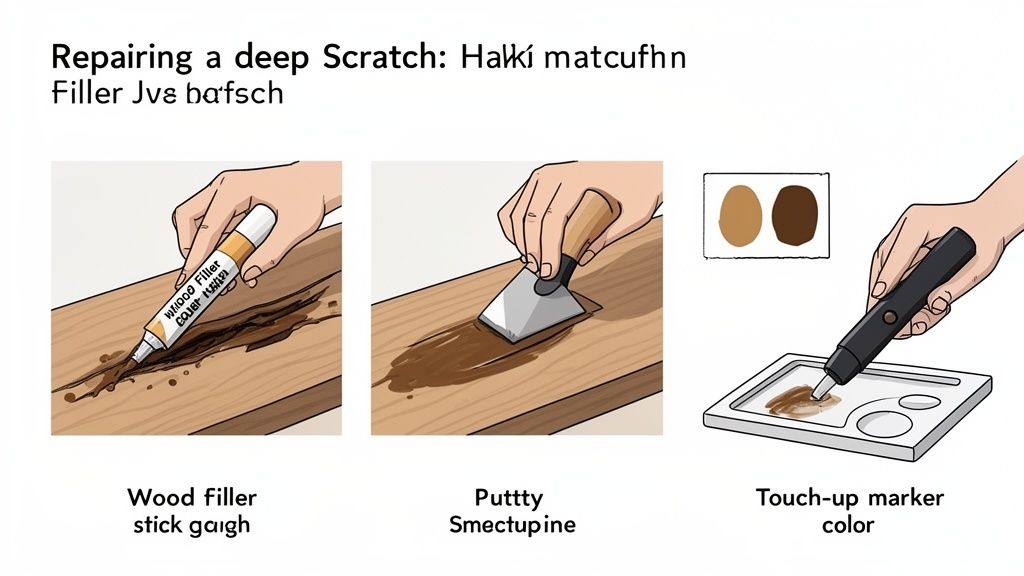
Using Wood Filler Sticks and Wax Pencils
When a gouge has physically removed a sliver of wood, your first goal is to fill that void. This is where wood filler sticks and wax pencils really shine. They’re made specifically to fill in those deeper wounds and blend in with your furniture's color.
- Color Matching is Key: These products come in a whole spectrum of wood tones. The secret is to pick a color that’s just a little bit darker than your furniture’s stain. Filler often looks lighter once it dries and settles.
- Application is Simple: Just rub the wax stick or pencil across the gouge. Keep going until the depression is filled and even slightly overfilled. Don't worry about it being perfect just yet.
- Smooth it Out: Grab a plastic scraper or even an old credit card to gently scrape away the excess. Hold the card at an angle and skim it across the surface until the filled area is perfectly flush with the wood around it.
- The Final Buff: With a soft, clean cloth, buff the repaired spot. This will remove any leftover residue and bring back that lovely sheen.
This method is a lifesaver for everything from a solid Mavin bedroom set to a vintage piece you picked up. It’s a straightforward fix for substantial damage without getting into a full-blown refinishing project.
Mastering the Art of Touch-Up Markers
What if the scratch has removed the color but not the wood itself? A touch-up marker is your new best friend. Now, these aren't the markers from your kid’s art set. They contain a special translucent stain that lets the wood grain show through, which is the key to a natural-looking repair.
The real trick is to build the color up slowly. Start with short, light strokes right in the scratch, making sure you follow the direction of the wood grain. Immediately wipe away any excess with a clean cloth—this prevents that tell-tale "halo" of color from forming around the scratch.
Our Design Team's Pro-Tip: The biggest mistake we see is people trying to cover the scratch in one heavy, dark coat. A much better approach is to apply one light layer, let it dry for a few minutes, and then see how it looks. If it's still too light, add another thin layer. This layering technique gives you so much more control for a perfect match.
Always, always test the marker on a hidden spot first—like the underside of a tabletop or the back of a leg—to be sure the color is a good fit.
For really extensive damage where these fixes just won't cut it, you might need to think bigger. Sometimes, professional interventions like hardwood floor resurfacing or refinishing are required for floors, and the same principle applies to heavily damaged furniture. If you feel like your piece might need a complete overhaul, our guide on how to refinish wood furniture is a great place to start.
Keeping Your Wood Furniture Looking Its Best
Once you've put in the work to remove those annoying scratches, the last thing you want is for new ones to appear. Honestly, the best repair is the one you never have to make in the first place. For homeowners here in Central Florida, a little proactive care goes a long way in protecting your furniture from daily life and our unique, humid climate.
Taking a few simple, preventative steps can preserve that beautiful finish for years. Think of it as an ongoing commitment to the pieces you love, ensuring the American-made quality of a Smith Brothers sofa or the custom elegance of a Canadel dining set continues to shine. This isn't about walking on eggshells around your furniture; it's about forming smart, easy habits.
Everyday Habits for a Scratch-Free Home
Most of the time, damage comes from small, unintentional moments. Keys tossed on a console table, a decorative vase sliding across a surface, or a pet jumping up to say hello can all leave their mark. The good news? These are easy to prevent with a few simple tweaks.
- Coasters and Placemats Are Your Best Friends: This is non-negotiable, especially here in Orlando where humidity is a constant battle. Coasters protect against moisture rings from sweating glasses, while placemats guard against scrapes from plates and cutlery.
- Give Your Decor Soft Feet: Place soft felt pads on the bottom of anything that sits on your wood furniture. This includes lamps, decorative bowls, picture frames—anything that could potentially scratch the finish if it gets bumped or moved.
- Create a "Drop Zone": Designate a specific spot, like a decorative tray or bowl, for keys, mail, and other pocket-dump items. This simple habit prevents the mindless tossing of objects that causes countless tiny scratches over time.
Why Proper Cleaning is Crucial
Dust might seem harmless, but it’s actually made of tiny, abrasive particles that can create microscopic scratches over time. When you wipe furniture with a dry, rough cloth, you’re essentially dragging that grit across the surface, dulling the finish and making it more vulnerable to visible damage.
The right way to do it is to use a soft, slightly damp microfiber cloth. This method lifts the dust away from the surface instead of just pushing it around. Regular, gentle dusting maintains the integrity of the protective finish—your furniture’s first line of defense. It's especially important for preserving the beautiful, durable finishes found on high-quality brands like Mavin and Simply Amish.
As our Design Team often advises, "Think of your furniture's finish like the clear coat on a car. Keeping it clean and protected is the best way to maintain that deep, rich luster and prevent bigger problems down the road."
Protecting Furniture from the Florida Sun and Air
Living in the Sunshine State means we have a few extra things to consider. The intense Central Florida sun can be surprisingly tough on wood finishes. Prolonged exposure to direct UV rays can weaken the protective layer, making it more prone to scratching and discoloration.
If you can, try to position valuable pieces away from windows that get that harsh, direct afternoon sun. Or, simply use blinds and curtains to filter the light during the brightest parts of the day.
For an even deeper dive into safeguarding your pieces, you can read our ultimate guide on protecting wood furniture. By adopting these simple yet effective habits, you can keep your furniture looking as beautiful as the day it arrived in your home.
When a DIY Fix Is Not Enough
DIY repairs are fantastic for handling the everyday wear and tear that comes with a busy Central Florida lifestyle. Scuffs, minor scratches, and dull spots are often well within reach for a determined homeowner. However, some jobs require a level of precision and expertise that goes beyond even the best at-home kits. Knowing when to step back and call a professional is just as important as knowing how to use a wax pencil.
There are a few clear red flags that indicate a scratch or blemish is too severe for a DIY approach. If you're looking at deep gouges where wood has been splintered or chunked out, it’s time to seek expert help. The same is true for extensive water damage that has caused the wood to swell, darken significantly, or turn black.
Delicate antique heirlooms or furniture with complex, high-gloss finishes are also in the "pro-only" category. A mistake on these pieces can be irreversible and heartbreaking.
Recognizing the Limits of DIY Repair
A professional restorer brings a unique set of skills to the table that are nearly impossible to replicate at home. They have access to specialized tools and materials for perfect color matching, grain replication, and finish blending that you just can't find at a big-box store.
For a high-value piece, like a Stickley bookcase that’s been in your family for years, their expertise ensures the repair enhances its value rather than diminishes it. They know how to work with the original finish, preserving the piece's integrity and heritage.
We’ve always believed that caring for quality furniture is a lifelong commitment. While we don't offer in-house repair services, our dedication to your long-term satisfaction means providing honest, practical advice. If you're unsure about tackling a repair, we're here to help you make the right call.
A Trusted Local Resource for Furniture Care
The wood furniture repair market has seen significant growth, highlighting a strong trend toward preservation and sustainability. It's not surprising, especially when you see that minor fixes claim over 50% of the market share for repair services. Here at Slone Brothers Furniture, serving Greater Orlando since 1980, we see this preference daily. Most people would much rather repair a cherished piece than replace it. You can learn more about how the furniture repair market is growing by reading these market insights.
Our role in the community extends beyond our Longwood showroom floor. We aim to be a trusted local resource for everything related to fine furniture. While we may not be the ones refinishing your tabletop, our in-house experts on the Slone Brothers Design Team can offer invaluable guidance.
They can help you assess the damage, understand your furniture’s specific finish, and recommend the best course of action. Think of us not just as a retailer, but as your helpful neighbor in furniture care.
Your Top Furniture Repair Questions, Answered
Here in our Longwood showroom, we talk with Central Florida homeowners every single day about their furniture. From heirloom pieces passed down through generations to brand new dining sets, people want to know how to keep their wood furniture looking its best. We get a lot of the same great questions, so we thought we’d answer a few of the most common ones right here.
Can I Just Use Olive Oil to Fix Scratches?
We see this "hack" online all the time, but please, step away from the pantry! Using olive oil or any other cooking oil on your furniture is a big mistake.
Sure, it might make a light scratch look a little darker for a few hours, but it doesn't actually fix anything. Worse, that oil will just sit on the surface, attracting dust and turning into a sticky, grimy mess. Over time, it can even go rancid, creating a nasty smell and potentially damaging the wood's finish for good. It's always better to stick with products made specifically for wood care.
Will These DIY Methods Work on All My Wood Furniture?
The gentle, at-home fixes we've discussed are fantastic for the vast majority of modern, solid wood furniture. They're perfect for the durable, family-friendly pieces we carry from American-made brands like Bassett or the beautiful Amish-crafted tables and chairs from Mavin. These pieces are built with modern, resilient finishes like polyurethane or lacquer that are designed for real life.
That said, you definitely need to be more careful with certain types of furniture.
- Antiques: Older furniture, especially pre-1960s, often has a delicate shellac or varnish finish. Modern products (and even some gentle cleaners) can easily damage or strip these fragile surfaces.
- High-Gloss Finishes: Think of a shiny, lacquered piano. These finishes show every tiny flaw, and a clumsy repair attempt can create a cloudy spot that's much more noticeable than the original scratch.
- Veneered Furniture: If a scratch goes deeper than that very thin top layer of real wood, you run the risk of chipping the veneer or causing it to peel away from the core material underneath.
Our Best Advice: When in doubt, always test. Find a hidden spot—the back of a leg, the underside of the tabletop—and try your product or technique there first. It’s a simple step that can save you a huge headache.
What’s the Hardest Scratch to Fix Myself?
Without a doubt, the toughest jobs are the deep gouges that have torn through the finish, the stain, and have actually crushed or splintered the wood fibers themselves. These aren't just scratches; they're wounds in the wood. Fixing them properly requires professional-grade epoxy fillers, a keen eye for color-matching with multiple pigments, and even artistic skill to recreate the original wood grain pattern.
Another real challenge is any scratch that runs across intricate details, like carved legs, inlays, or the joints where two pieces of wood meet. Trying to sand and finish these areas without ruining the surrounding detail is incredibly difficult without professional tools and years of experience. For these kinds of major repairs, calling in an expert is the smartest way to protect your furniture investment.
Ready to find the perfect piece for your home? Visit the Slone Brothers Furniture showroom in Longwood, FL, and let our design experts help you get started!