
Bunkie Board DIY: Simple Steps to Build Your Own

A lot of Central Florida homeowners run into the same problem after a bedroom update. The new mattress feels great in the showroom, the bed frame looks right once it's in the room, and then the foundation question shows up at the worst moment. A tall box spring makes the whole setup sit too high, or the frame needs a flatter, firmer support surface than the old setup provided.
That's where a Bunkie Board DIY project makes sense. It's one of those practical weekend builds that can solve a real support issue without turning the bedroom into a full carpentry job. For many homes in Longwood, Lake Mary, Sanford, and the greater Orlando area, it's a smart way to get the low-profile look people want while still giving the mattress a more stable base.
Table of Contents
- Your Bunkie Board DIY Project in Central Florida
- Planning Your Project Materials Tools and Measurements
- How to Build a Solid Plywood Bunkie Board
- How to Build a Slatted Bunkie Board
- Finishing Your Board and When to Reconsider DIY
- From DIY Project to Dream Bedroom Visit Slone Brothers
Your Bunkie Board DIY Project in Central Florida
A common local scenario goes like this. A homeowner in Orlando buys a memory foam mattress, pairs it with a lower-profile bed, and realizes the old support setup doesn't fit the new look or the new mattress. The bed either sits awkwardly high or lacks the flat, dependable surface the mattress needs.
That's why a bunkie board keeps coming up in practical bedroom conversations. Historically, bunkie boards started with bunk beds and later became a popular low-profile foundation for modern mattresses. Pre-made versions are often priced around $50 to $150, which is one reason many homeowners consider building their own instead of adding another retail purchase to the project budget (history and pricing context).
Why this project fits so many Florida homes
In Central Florida, bedroom projects often have two goals at once. People want a clean, sleek bed height, and they also want support that doesn't feel improvised.
A DIY bunkie board can help with both. It sits low, it can be cut to fit the frame cleanly, and it's straightforward enough for a careful weekend build. For a mattress buyer still sorting out support needs, it also helps to understand the mattress side of the equation before cutting any wood. A quick guide on how to choose a mattress can help match the support surface to the bed that's in the room.
A bunkie board works best when it solves a specific support problem, not when it's used as a catch-all fix for every bed.
What seasoned furniture people look at first
Before building anything, the first question isn't wood species or screw length. It's whether the bed needs a bunkie board at all.
The useful setups are easy to spot. A platform frame that needs a flatter surface, a mattress that benefits from firmer support, or a lower bed profile that rules out a bulky box spring are all reasonable cases for a DIY approach. The less useful setups show up later in this guide, because not every frame should have a board added to it.
Planning Your Project Materials Tools and Measurements
Good results come from planning, not from trying to fix a bad cut after the sheet is already on the sawhorses. The strongest DIY builds usually start with the same discipline used in furniture delivery and setup. Measure the frame carefully, confirm where the support sits, and build to that space instead of assuming the mattress label tells the whole story.
Choose the right build style first
There are really two practical paths.
- Solid plywood board: Best when the goal is a flatter, firmer support surface with a simple build.
- Slatted board: Better when airflow matters more and the builder wants a lighter structure with rail-and-slat construction.
For a sturdy, low-profile foundation, the safer material choice is 3/4-inch plywood. Builders also commonly drill 3/8-inch ventilation holes spaced about 4 to 6 inches apart to help reduce trapped moisture under the mattress, which is a real concern in humid climates like Central Florida (plywood and ventilation guidance).
Practical rule: In Florida humidity, raw thin sheet goods are where problems start. A sturdier plywood panel holds shape better and gives the mattress a more dependable surface.
Materials and tools worth gathering before the first cut
A clean plywood build doesn't require a huge shop. It does require the right prep.
Recommended materials
- 3/4-inch plywood: Better structural stiffness than thin particle board for this kind of low-profile support.
- Upholstery fabric: Useful for wrapping the finished board so the mattress doesn't rest directly on raw wood.
- Sandpaper: Needed to soften corners and edges.
- Fasteners if using a multi-piece build: Helpful for edge cleats or support strips if the frame requires them.
Basic tools
- Tape measure: The inside frame dimension matters more than the nominal mattress size.
- Straightedge or guide: Helps keep cuts clean.
- Saw suited to sheet goods: A controlled straight cut saves a lot of cleanup.
- Drill with 3/8-inch bit: For ventilation holes in a solid panel.
- Staple gun: Useful if fabric is being wrapped around the board.
For readers who like to compare general material-planning advice before a build, XTREME EDEALS INC. fence resources offer a good example of how organized supply planning can simplify a weekend wood project, even though the application is different.
A second measurement habit matters just as much. Bring the inside dimensions of the bed, not the advertised bed size, when buying wood or requesting cuts. That same idea shows up in room planning too, and a guide on how to measure furniture helps prevent the kind of fit mistakes that waste a whole sheet.
Bunkie Board DIY Cut Dimensions
The safest rule is to measure the actual bed base, then cut the board to fit inside it with a little clearance. A common recommendation is to subtract about 1 inch from each dimension so the board drops in cleanly and doesn't bind against the frame, as covered in the build section below.
| Bed Size | Recommended Plywood Dimensions |
|---|---|
| Twin | Measure the inside bed base, then subtract about 1 inch from each dimension |
| Full | Measure the inside bed base, then subtract about 1 inch from each dimension |
| Queen | Measure the inside bed base, then subtract about 1 inch from each dimension |
| King | Measure the inside bed base, then subtract about 1 inch from each dimension |
That table may look simple, but it prevents the most common DIY mistake. A board that's technically the right mattress size can still be the wrong frame size.
How to Build a Solid Plywood Bunkie Board
The solid plywood version is the most straightforward bunkie board DIY build. It's also the easiest one to get wrong if the sheet is cut too tight or left unfinished at the edges.
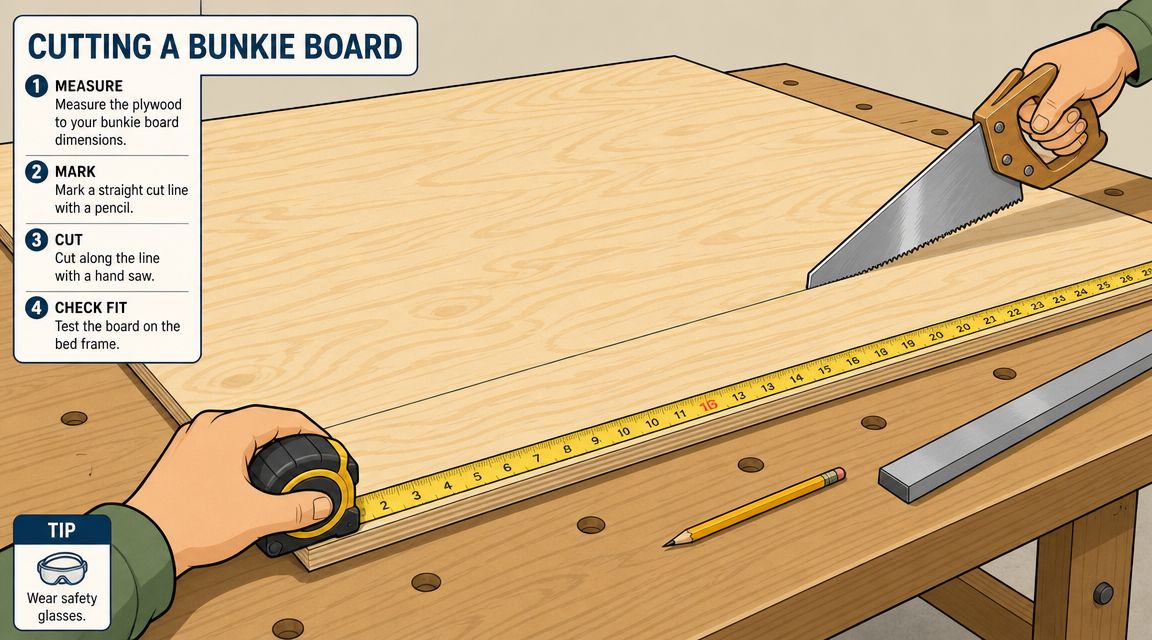
A properly constructed bunkie board can typically support 250 to 500 pounds, depending on bed size. Guidance for this type of build also recommends measuring the base carefully, subtracting about 1 inch from each dimension, smoothing all sharp edges with sandpaper, and covering the board with upholstery fabric to protect the mattress.
Cutting and prepping the panel
Start with the actual inside measurement of the frame. Mark the plywood from that measurement, not from the mattress tag, then reduce each dimension by about an inch so the board can sit inside the frame without scraping or jamming.
After the cut, run sandpaper over every edge and corner. This step matters more than many people expect. A rough edge can catch fabric, rub the mattress cover, and turn a clean project into one that slowly damages the bed.
A helpful reference point for anyone comparing wood surfaces and durability in the home is this guide to the best wood for furniture. The build here isn't fine furniture, but the same logic applies. Better material choice usually means better long-term stability.
Ventilation and final fit
Before covering the board, drill ventilation holes across the panel if the build calls for a solid surface. Keep the pattern even so support stays consistent. Then test-fit the board in the frame before adding fabric.
Once the fit is confirmed, wrap the board in upholstery fabric and staple it neatly underneath. The goal isn't decoration. The goal is a barrier between mattress and wood.
A clean plywood build usually follows this order:
- Measure the inside frame opening
- Mark and cut the panel
- Sand all edges and corners
- Drill ventilation holes
- Test-fit in the frame
- Wrap with upholstery fabric
- Set the mattress back on top
A bunkie board should look intentional once it's installed. If it drops into the frame cleanly and the mattress sits flat without rocking, the job is on the right track.
How to Build a Slatted Bunkie Board
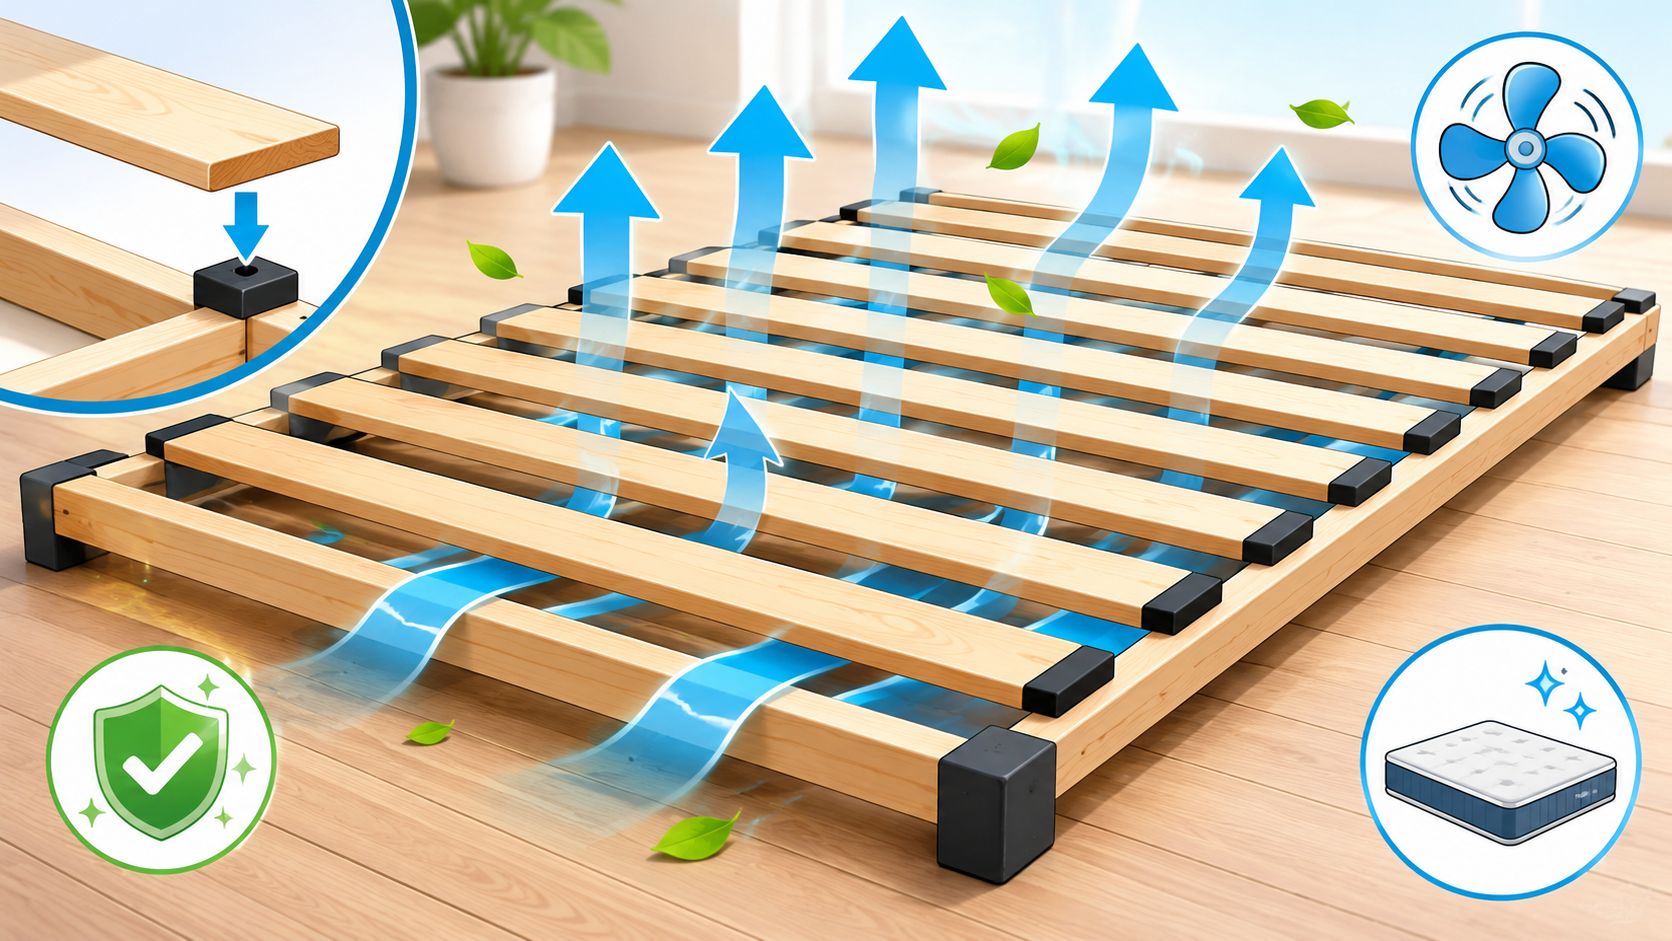
A slatted bunkie board is a different kind of project. It takes more assembly time, but it rewards that effort with better airflow and a lighter structure. In Central Florida bedrooms, that extra breathability can be appealing, especially in rooms that already tend to hold warmth.
When a slatted version makes more sense
The slatted version is a good fit when a solid panel feels too heavy, too closed-in, or less breathable than the room needs. It also gives the builder more flexibility if the frame already has a structure that works well with rails and evenly spaced slats.
That said, it asks for more precision. Each slat needs consistent spacing, and the support rails have to stay square from one end to the other. A sloppy slat build can create uneven support faster than a simple plywood panel ever would.
A proven full-size slat recipe
For a full-size bed, one documented build uses 13 slats of 1×4 whitewood cut to 54 inches, plus three 2×4 support rails cut to 75 inches. It also uses 2.5-inch spacers to keep the gaps even, and assembly is done by pre-drilling and fastening the slats to the rails from one end to the other (full-size slat build details).
The assembly sequence is simple:
- Cut the slats first: Keeping all slats uniform matters more than speed.
- Cut the support rails to length: Three rails help distribute load across the frame.
- Use spacers as you go: That keeps the slat gaps consistent instead of relying on eye judgment.
- Pre-drill before driving screws: This helps keep the wood from splitting.
- Work from one end to the other: That keeps the layout aligned as the structure comes together.
A slatted bunkie board can be the better call when the builder wants a more open support system. The trade-off is labor. There are more pieces, more fastening points, and more chances for cumulative error if the layout starts out crooked.
Good slat spacing isn't about appearance. It's about making sure the mattress feels the same at the foot, center, and head of the bed.
Finishing Your Board and When to Reconsider DIY
A homemade bunkie board can work well, but the finishing details are what separate a serviceable panel from something that belongs under a mattress. This is also the point where honest advice matters most, because some beds shouldn't get a DIY board at all.
How to give the board a finished look
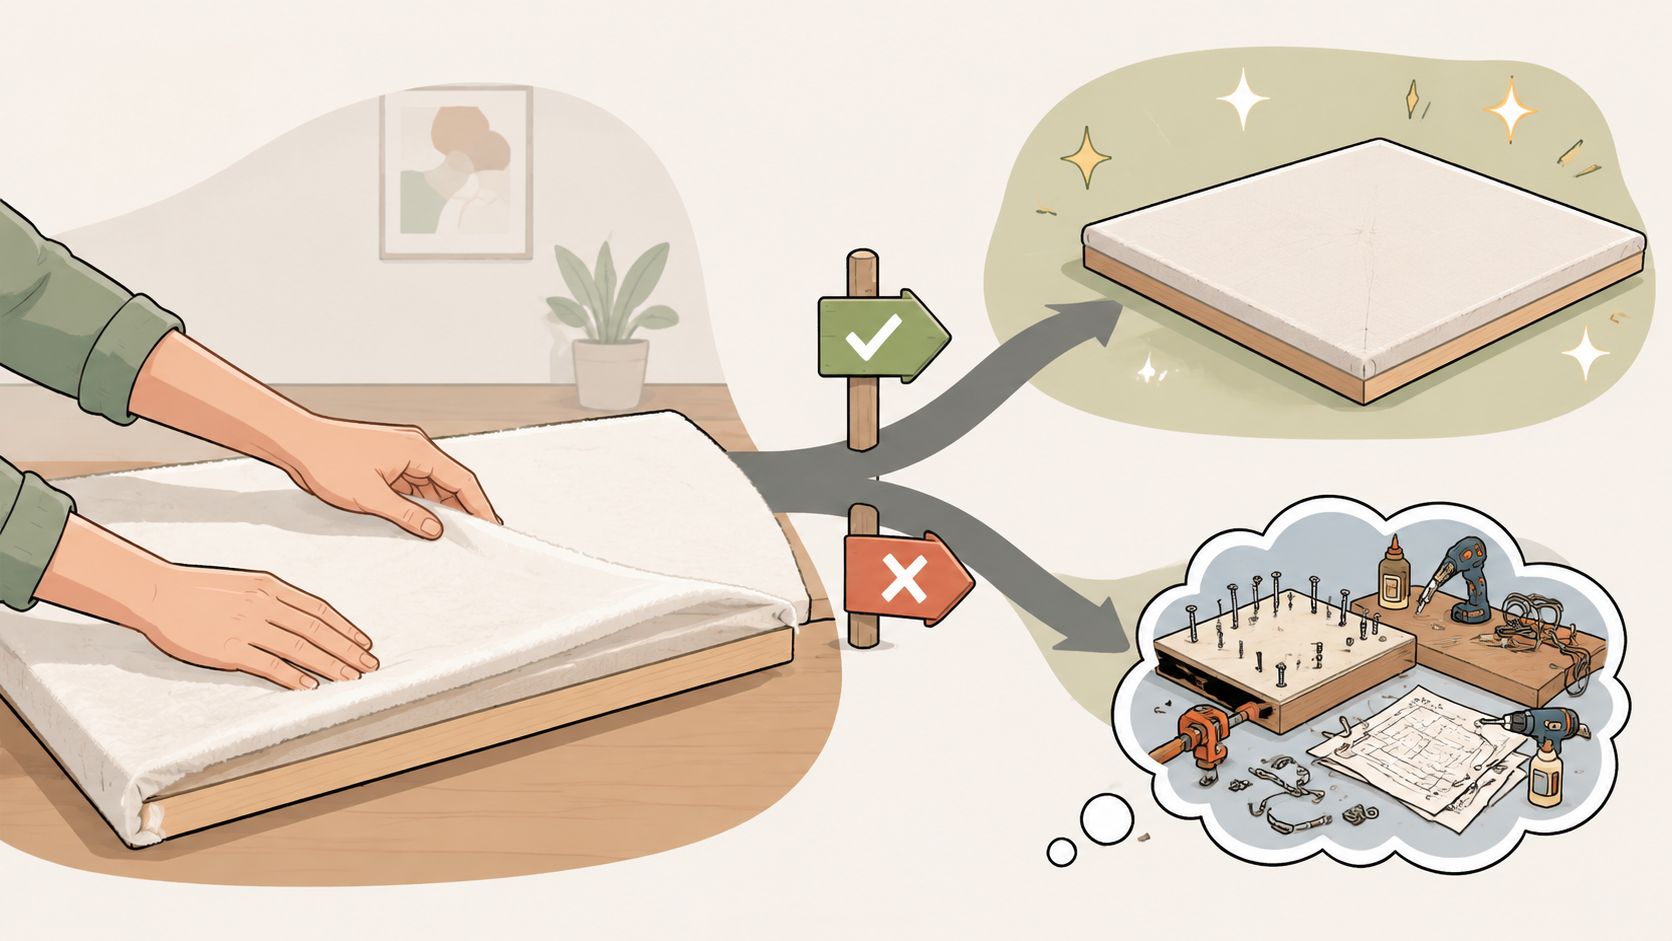
The simplest finish is upholstered fabric wrapped tightly around the board and stapled underneath where the mattress won't contact the fasteners. Pull the fabric snug enough to avoid bunching, but not so tight that it distorts the corners.
If the board is going into a bed used every night, inspect the underside before installation.
A final finishing checklist helps:
- Check for splinters: Run a hand carefully along the perimeter before wrapping.
- Confirm staple placement: Staples should sit cleanly and not protrude.
- Test for rocking: The board should sit flat in the frame.
- Look at edge clearance: If the board binds, remove it and trim before forcing it in.
For anyone working on wood touch-ups elsewhere in the home, a guide on how to refinish wood furniture is useful background for sanding and finishing habits, even though a bunkie board is a more utilitarian project.
When a DIY bunkie board is the wrong answer
This is the part many online guides skip. A DIY bunkie board is not a universal fix.
One important warning is clear. DIY bunkie boards do not work with adjustable bases because they interfere with the base's movement and function. In some setups, a DIY board may also fail to provide the engineered support required by certain mattress warranties, which makes a purpose-built foundation the better option (adjustable base and warranty caution).
That means a homeowner shouldn't build first and ask questions later. If the mattress paperwork calls for a specific support system, the support requirement should be checked before the first cut.
A broader explainer that can help sort through the support categories is this article to compare mattress foundation vs. box spring. It's useful when the issue isn't just board-versus-no-board, but which type of support belongs under the mattress in the first place.
DIY usually makes sense when:
- The frame is fixed and stable: No moving base, no flexing mechanism.
- The goal is lower profile support: Especially with platform-style looks.
- The builder can measure and finish carefully: Fit and edge prep matter.
A professional product is usually smarter when:
- The bed uses an adjustable base
- The mattress warranty has specific foundation requirements
- The existing frame is weak or already failing
- The homeowner wants a finished, engineered solution instead of a shop project
That kind of trade-off is worth stating plainly. A bunkie board can solve a support problem, but it can also hide a deeper frame issue for a while instead of fixing it.
From DIY Project to Dream Bedroom Visit Slone Brothers
A finished bunkie board can tighten up the whole feel of a bed. The mattress sits lower, the foundation looks cleaner, and the support often feels more intentional than a mismatched old setup. But a support layer only fixes one part of the room.
A foundation solves one problem not the whole room
Many bedroom projects start with mattress support and end somewhere larger. Once the bed height is corrected, the nightstands may suddenly feel too low. The headboard may look undersized. The mattress itself may turn out to be the underlying comfort problem.
That's where a complete-room view helps. In a Longwood or Lake Mary home, the best bedroom result usually comes from looking at the frame, mattress, storage pieces, and room proportions together instead of solving each item in isolation.
Local help for the next bedroom decision
Since 1980, Slone Brothers Furniture has served Central Florida as a local, family-owned showroom focused on quality furniture, mattresses, and room planning. For homeowners who finish the DIY project and then want help with layout, scale, or a full bedroom refresh, the store's interior design consultation services are one practical resource.
That kind of guidance matters when the bedroom needs more than a support fix. American-made and Amish-crafted options, custom-order flexibility, and coordinated bedroom furniture can make more difference than another patch under the mattress. The same goes for homes that need a more complete solution instead of another workaround.
Ready to find the perfect piece for your home? Visit Slone Brothers Furniture in Longwood, FL, and let the design experts help you get started!